Invite Stephanie to Your Book Club!
My goal for 2027 is to meet with 52 reading groups – one per week – please help me meet that goal! It would be my honor to visit your book club via Zoom, even if it’s only a few people who randomly decided to read The Blue Hours together.
I spent many hours in solitude researching working on The Blue Hours—but literature, at its best, is never a solo pursuit. This book wouldn’t exist without my communities; books come alive when discussed. It would be fulfilling for me to discuss and answer questions about The Blue Hours with a small group of readers.
Below are resources for small gatherings, like discussion questions as well as some fun Antarctic-themed recipes. Please contact me directly to schedule a virtual visit by filling out the form below! Serious inquiries only please—I will not pay money, nor do I expect any, to attend your book club.

Photo by Jenn Anibal
The Blue Hours Discussion Questions
Here are discussion questions as a springboard for conversation. Click on the “plus” button to expand the questions. Warning: some light spoilers ahead!
-
What is a moment or line from The Blue Hours that resonated with you? Was there anything that made you laugh or cry?
Stephanie writes about her immediate response to finding out she could live and work in Antarctica: “Something inside of me kindled. You either desire Antarctica, or you don’t—and I did.” If you could easily hit the pause button on your commitments, would you ever want to spend time in Antarctica or a place like it? Why or why not?
MORE TO COME…
Antarctic Cuisine: A Primer
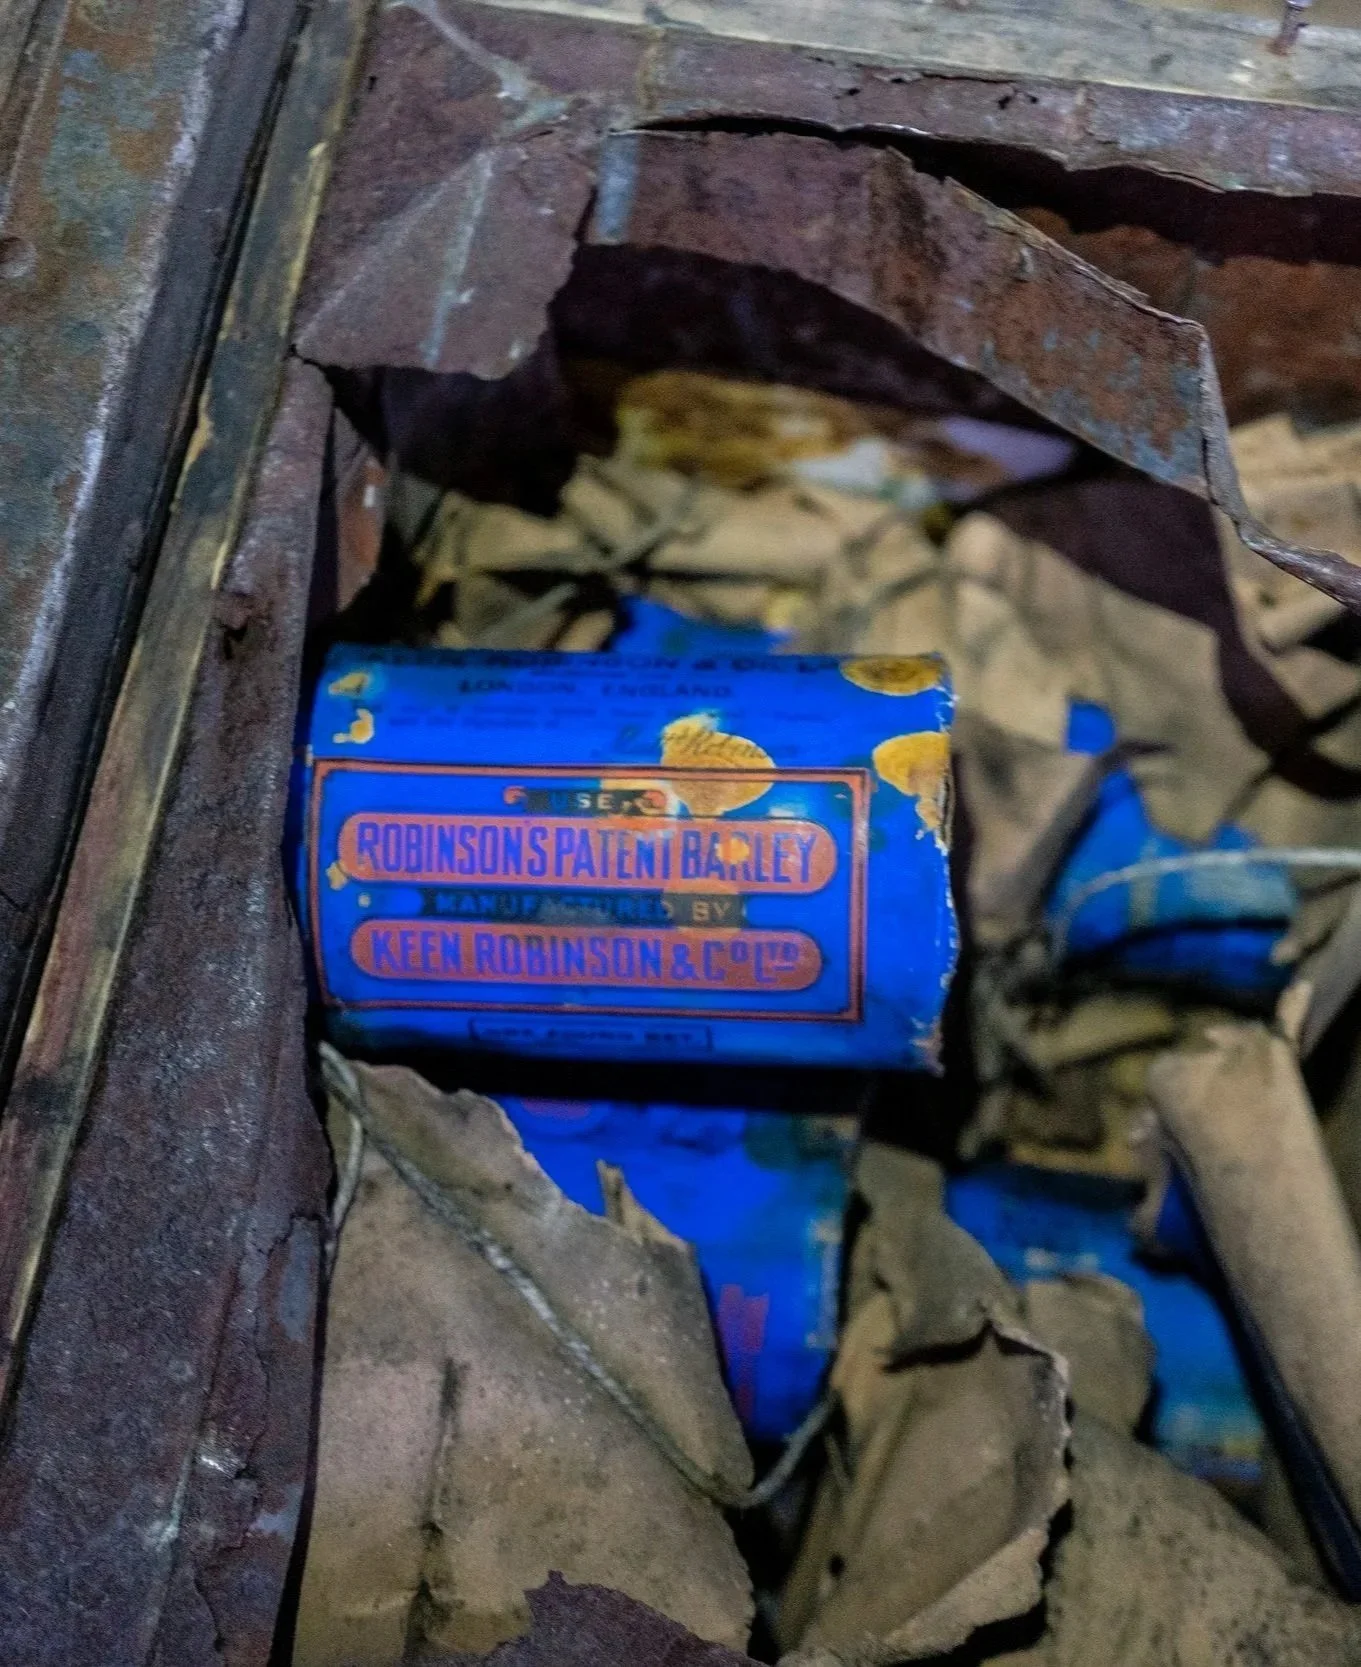
Abandoned Food in Discovery Hut
If you traveled to Antarctica in 1910, you would have eaten sautéed penguin breast and savory seal brains on toast (if you were lucky) to supplement the food you brought from civilization. Today, eating native Antarcticans is forbidden, and now we know that a lack of Vitamin C leads to scurvy—but some things haven't changed.
If we're away from the sea, we still melt snow for water. We still favor warm drinks. Chocolate is a historically significant ingredient. Vegetables, or "freshies" as we call them, are still in short supply. We still eat expired food preserved in the cold.
A few of my favorite resources on Antarctic gastronomy are Jason C. Anthony's book Hoosh: Roast Penguin, Scurvy Day, and Other Stories of Antarctic Cuisine (which has been re-branded as The Roast Penguin Chronicles probably because no one knows what "hoosh" is, but more on that below) and Wendy Trussler and Carol Devine's book The Antarctic Book of Cooking and Cleaning: A Polar Journey.
In 2017, just before I wintered, Anthony Bourdain visited McMurdo and our environs to film an episode of Parts Unknown. Season 9, episode 5 is the Antarctic episode, and it’s worth checking out.

The Blue Hour Inspired Food & Drink
Beverages
-
It’s hard to overstate the importance of chocolate to Antarcticans. In The Blue Hours, when Cherry, Birdie, and Uncle Bill return to Discovery Hut after they nearly died fetching Emperor Penguin eggs, they "gorged themselves on hot chocolate, falling asleep between mouthfuls." Tom Crean, another historical Antarctic legend, once walked 35 miles to save a friend's life with only a bar of chocolate in his pocket. I often remembered that detail when I walked to Hut Point with dark chocolate I kept in my parka or the warm liquid version in my travel mug.
Chocolate isn't just a sweet for sweet tooths. In polar survival scenarios, it's important to keep some food, especially sweets, with you. Simple carbs and sugars are critical when you're at risk of hypothermia, and cacao has some nutritional value.
As I wrote The Blue Hours, I allowed myself one mug of hot cocoa per writing day. It brought me back, body and mind, to Antarctica.
Steph’s Quick Hot Chocolate
Put a heaping spoonful of raw cacao, however much strikes your fancy, into a big mug. Add hot water or your milk-of-choice warmed on the stove. I usually do mostly hot water and add some milk for creaminess.
Sweeten with your sugar of choice. I love honey or real maple syrup (never the fake stuff!).
I sometimes add ceylon cinnamon for the flavor and anti-inflammatory effects. If I'm in the mood, I'll add a dash of cayenne for some heat!
Champurrado (Mexican Hot Chocolate)
I love anything labeled "drinking chocolate," but another fun twist on the queen of beverages is champurrado, sometimes known as Mexican hot chocolate. This isn't hot chocolate with chile sprinkled in. Champurrado is a spin-off of atole, a traditional corn-based drink. It's thick, creamy, sweet, earthy, and most importantly, chocolately.
The convenient version can be made with Abuelita Hot Chocolate in the yellow and red packaging, which you can find in any Mexican grocery store and many big-chain grocery stores.
Here's a champurrado from scratch recipe I've taken from Rick Martínez's excellent cookbook Mi Cocina.
A tip on ingredients: traditional Mexican sugar is called "piloncillo," which usually comes in a cone shape and is at any Mexican grocery store. You should also be sure to use masa, not cornmeal.
Ingredients to serve 4
5.64 ounces (160 grams) grated piloncillo or dark brown sugar
1 3-inch stick of canela or cassia cinnamon
1/2 tsp Morton kosher salt (0.14 oz/4g)
5.64 oz (160 grams) fresh white fine-grind corn masa for tortillas
3.88 oz (110 grams) dark chocolate, 72% cacao, preferably from Tobasco, chopped
Instructions
In a medium saucepan, bring five cups of water, the piloncillo, canela, and salt to a boil. Cover the pot, reduce the heat to medium-low, and simmer for 20 minutes.
Remove the cinnamon stick if using; it's okay to leave the canela. Pour half of the piloncillo infusion into a blender. Add masa and process until smooth and no lumps of masa remain.
Add masa puree to the remaining piloncillo infusion in the saucepan and add the chocolate. Increase the heat to medium-high and cook, whisking frequently, until the mixture boils and the chocolate is completely melted, for about 3 minutes. Serve hot. Enjoy!
-
By the way McMurdoans utter the name “Frosty Boy” ...you might think they speak of a icy deity. But no. Frosty Boy is a soft-serve ice cream machine in a place that has no real milk. Ours was made from powdered milk, which was a little disappointing in coffee. On special occasions, Sunday brunch, or whever I felt like it, I added a small mountain of Frosty Boy to my coffee.
To re-create, add a scoop of vanilla ice cream to your cup of coffee!
-
One rite of passage in Antarctica is sipping Shackleton Whiskey on authentic glacial ice. You are probably not going to be able to acquire glacial ice, but you can sample Shackleton Whiskey. The story goes that in 2007, conservators working in Shackleton's hut at Cape Royds, Antarctica found 11 bottles of Mackinlay's Rare Old Highland Malt Whiskey, a 114-year-old forgotten whiskey, under the floorboards from the Nimrod Expedition. The manufacturer had lost the recipe, but samples were taken from the bottles, and thanks to painstaking research, the whiskey was re-created.
-
Tea Is another treasured Antarctic beverage, not merely because it's warm, nor because the British (rabid tea-drinkers) were early notable Antarcticans, but because it's so versatile and a good water substitute. Antarctica is dry, so much so that it is difficult to stay fully hydrated there. Some Antarcticans (ahem, yours truly) feel "bored" drinking water, so tea helps us stay turgid. I hated fruit teas before Antarctica; I learned to love them there, especially mango tea. My other favorite was the Sweet & Spicy tea from Good Earth tea and Tulsi Sweet Rose tea from Organic India.
One of my favorite ways to drink tea was as the base of a hot toddy, with or without alcohol. I often brought a hot toddy in a thermos with me to Hut Point, which is often mentioned in The Blue Hours.
The "proper" starting place for a toddy is to fill a mug with boiling water, let it sit so the mug warms up, then throw out the water first (so the mug is extra hot)—but you don't have to go through that step if you don’t want to.
Steph's Basic Hot Toddy Recipe
Tea, any kind you like
Add a squeeze of lemon to taste (or lemon juice if you don't have a fresh lemon)
Add sweetener. I prefer honey.
(Optional) Add a splash to two ounces of alcohol. I usually used whiskey, but you could try scotch, bourbon, rye, dark rum, cognac, amaro, whatever!
(Optional) Add a garnish! Could be a cinammon stick, some star anise, other mulling spices. You could add slices of fruit (citrus is especially nice), either fresh or candied or dry. Herbs, like a sprig of rosemary or thyme. Even fresh edible flowers!
(Optional) If you want to get really fancy, you can add sugar and spice to the rim! Take a lemon or orange wedge and run it around the rim you'll put the toddy in. Mix two tablespoons of sugar with half a teaspoon of cinnamon with a dash of ginger and nutmeg on a plate. Dip the citrus-moistened rim in the spice and sugar mix.
-
“A rich violet cloud bloomed in my hand,” I wrote in The Blue Hours, describing pouring crème de cassis, a liquor I had brought from New Zealand, into a gold-rimmed glass of seltzer. Southern lights are usually green, but they can also be a bright fuchsia pink, like this drink. Crème de cassis is made from blackcurrants, a rich full flavor I love.
You could also make a non-alcoholic version of this drink with any purple berry syrup or juice. I suggest elderberry or blackcurrant syrup if you can find it (I have used the medicinal stuff from health food stores), or something easier to find, like pomegranate, cherry, etc. It may require some sweetening!
-
In Antarctica, I learned that my favorite color was green...the color the night sky gave us when we most needed it. The green fire of auroras was one of the best parts of winter.
Another Antarctic association that may not seem obvious are apples. When we received fresh fruit after going without, it was usually bananas, oranges, and apples. Apples lasted the longest. You could hoard a few in your fridge for when you began to have sensual dreams about produce. Even Cherry wrote about receiving apples in 1913 after two years in Antarctica. "Beauties," he called them.
"When she placed an apple in my hand, I felt as though I’d never truly appreciated an apple before," I wrote in The Blue Hours. "A delicate flower fed by clouds and sunlight had grown into this plump, sweet fruit. Life was poignant here, not in spite of severe conditions, but because of them. I rubbed the apple’s miraculous cheek against mine."
In honor of both auroras and apples, I give you the aurora appletini!
Aurora Appletini Cocktail
Ingredients to serve 1
1.5 ounces vodka
1 ounces of green apple schnapps
1/2 ounce of orange liqueur, such as triple sec or Cointreau
Apple slices
Instructions
In cocktail shaker filled with ice, add the liqueurs, shake vigorously, then strain into a martini glass
Add green apple slices as a garnish. Make it a cross-section of the apple so it looks fancy. Also, let the slices sit in a bath of one cup of water with one tablespoon of lemon juice so it doesn't brown too quickly.
Aurora Appletini Mocktail
Ingredients to serve 1
2 ounces of freshly pressed apple juice, green or golden
1/4 ounce of lemon juice
1/2 simple syrup
Apple slices
Instructions
In cocktail shaker filled with ice, add the ingredients, shake vigorously, then strain into a martini glass
Add green apple slices as a garnish. Make it a cross-section of the apple so it looks fancy. Also, let the slices sit in a bath of one cup of water with one tablespoon of lemon juice so it doesn't brown too quickly.
Snacks & Desserts
-
In 2016, a group of conservators with the Antarctic Heritage Trust (AHT) were cataloging and conserving artifacts in a hut at Cape Adare when they found a tin with a 106-year-old fruitcake inside. The cake was made by Huntley & Palmers, a type brought south by the Terra Nova Expedition, which is featured in The Blue Hours. According to the AHT, the fruitcake “itself looked and smelt (almost) edible.”
According to Lizzie Meek, AHT’s Program Manager of Artifacts, fruitcake is “an ideal high-energy food for Antarctic conditions, and still a favorite item on modern trips to the Ice.”
Palmer’s 1885 recipe for Fruitcake reads like this:
“15 Butter
17 Sugar (raw)
20 Flour (3s)
40 Currants
5 Peel (long cut)
12 ¼ Eggs”
To make a more modern fruitcake, I trust King Arthur’s recipes. Here’s their “Quick Fruitcake” recipe, as well as a link to their gluten-free version:
King Arthur Flour’s Quick Fruitcake
Ingredients
8 tablespoons (113g) unsalted butter, at room temperature, at least 65°F
3/4 cup (149g) granulated sugar
1 teaspoon ground cinnamon
1/2 teaspoon ground ginger
2 teaspoons baking powder
1/2 teaspoon table salt
1 teaspoon King Arthur Pure Vanilla Extract
2 large eggs, at room temperature
1 1/2 cups (180g) King Arthur Unbleached All-Purpose Flour
1 cup (256g) crushed pineapple, undrained (1 small can)
1 cup (113g to 170g) dried fruit, of your choice
1/2 cup (57g) walnuts or pecans, diced
1/2 cup (99g) candied red cherries, each cut in half*
1 1/2 tablespoons coarse sparkling sugar, for topping, optional
Instructions
Preheat the oven to 350°F. Lightly grease a 9" x 5" loaf pan.
Place the butter, granulated sugar, cinnamon, ginger, baking powder, salt, and vanilla in a bowl, and beat till smooth.
Add the eggs one at a time, beating well after each addition.
Add the flour, stirring to combine.
Stir in the undrained crushed pineapple.
Stir in the fruits, nuts, and candied cherries.
Spoon the batter into the prepared pan, smoothing the top.
Sprinkle with coarse white sparkling sugar, if desired.
Bake the cake for 60 minutes, then tent it with aluminum foil. Bake for an additional 15 minutes, or until a cake tester inserted into the center comes out clean.
Remove the cake from the oven, and after 20 minutes loosen its sides, and turn it out of the pan onto a rack to cool.
Cool the cake completely before slicing.
Tips from Other Bakers:
For 30-minute fruitcake cupcakes: Prepare the cake batter according to the recipe instructions, and scoop a heaping 3 tablespoons of batter into the wells of a baby bundt pan (a jumbo cookie scoop heaped with batter works well here) — you'll be baking another batch, so about half the batter will remain. Bake the cakes for 15 to 18 minutes, until a cake tester or toothpick inserted into the center of one comes out clean. Transfer the pan to a rack, and after 5 minutes turn the cakes out onto the rack to cool completely. Repeat with the remaining batter. Yield: 22 to 24 cakes.
Candied cherries can be found at most supermarkets or you can learn how to make your own with our DIY Candied Cherries recipe.
-
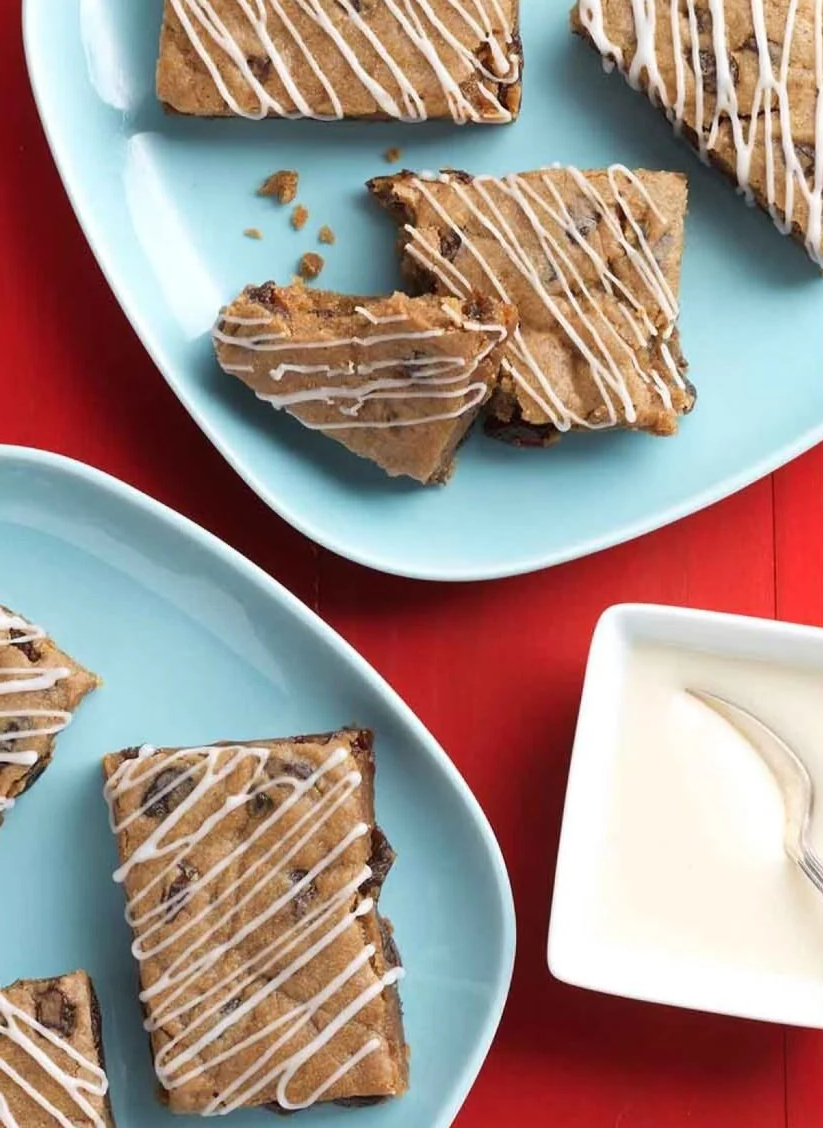
Hermit Bars are a more contemporary version of fruitcake that was readily available where I lived at McMurdo Station. When you entered the galley, the only place to get food, there was a large refrigerator that always had food ready (the “grab-n-go” fridge). Hermit bars, which were a tasty high caloric food to put in your backpack before you ventured outdoors, were often available.
Here is an authentic large batch recipe for a sheet pan of hermit bars (I just have ingredients, no instructions…)
Authentic McMurdo Hermit Bars
18 oz Butter
1200 g Sugar
12 oz Molasses
6 eggs
1440g AP Flour
2 TBS Baking Powder
1 TBS Salt
1 TBS Clove Powder
2 TBS Cinnamon
2 TBS Ginger Powder
¾ TSP Black Pepper
6 Cups Dried Currants
Another McMurdo baker friend of mine told me she used this King Arthur Flour recipe, which they describe like this:
King Arthur Flour Hermit Bars
“These moist, chewy bars are a New England classic. With their wonderful blend of molasses and spice, everyone will think there's ginger in them. But the real star is a more subtle flavor: allspice. Hermits keep and ship exceptionally well (up to a month in an airtight cookie tin); and benefit from a day or two of aging, so the spices can blend.”
Ingredients
Bars
1 1/3 cups (266g) granulated sugar
1/2 cup plus 2 tablespoons (113g) vegetable shortening
4 tablespoons (57g) unsalted butter, room temperature
1/4 cup (85g) molasses
3/4 teaspoon table salt
3/4 teaspoon ground allspice
3/4 teaspoon ground cinnamon
1 3/4 teaspoons baking soda
2 large eggs
5 cups (600g) King Arthur Unbleached All-Purpose Flour
1/3 cup (74g) water
2 cups (340g) raisins
Glaze
2 tablespoons (28g) milk
1 cup (113g) confectioners' sugar
1/2 teaspoon King Arthur Pure Vanilla Extract
Instructions
To make the bars: Preheat the oven to 375°F. Lightly grease a 10" x 15" jelly roll pan, or similar sized pan (this recipe was successfully tested in our 9 ½" x 14" jelly roll pan).
In a large mixing bowl, beat together the sugar, shortening, and butter, beating at medium speed until fluffy. Add the molasses, salt, spices, and baking soda. Mix for 1 minute, then stop the mixer and scrape down the sides and bottom of the bowl.
Add the eggs one at a time, beating well after each addition. Add half the flour and mix until combined. Add the water, mix to combine, then add the rest of the flour. Mix until incorporated (the batter will be somewhat stiff). Add the raisins and mix until evenly distributed.
Plop the batter into the prepared pan, and spread to distribute it evenly. For best results, either wet your hands and pat the top until smooth, or cover the dough with some plastic wrap and roll over it lightly to smooth the top. Peel off the plastic before baking.
Bake the hermits for 17 to 19 minutes, until the edges are light brown. They'll puff up in the oven and the top will get shiny. As soon as you see this, pull the pan from the oven. The top will fall back down and the interior of the cookies will have an almost fudgy consistency. Cool the bars completely, right in the pan, before glazing.
To make the glaze: Whisk together the milk, sugar, and vanilla until you have a glaze with thin, spreadable consistency. Use a pastry brush to coat the tops of the hermits, or drizzle in a decorative pattern and let the glaze set before cutting into bars. Cut the bars in small squares or rectangles (they're rich), remove from the pan, and serve.
Store any leftovers, well wrapped, at room temperature for several days. Freeze for longer storage.
Tip
Be careful not to overbake these bars. If you do, you'll get something that's more like a cake-type brownie, and it won't be as moist and irresistible.
-
If you set off to explore Antarctica in 1910, heading anywhere into the interior, you would rely on pemmican and sledging biscuits (and possibly eating your sled dogs and ponies, but that is another matter…).
Pemmican is a condensed form of meat and fat with very little carbohydrates, suitable for keeping a long time and convenient for traveling great distances. It’s similar to beef jerky, but less appetizing. Its origins are not with polar explorers but are traced to Indigenous people of northern North America.
Sledging biscuits are basically a form of hard tack. Think “giant cracker” that could be eaten as is with stuff smeared on top (often butter or Marmite) or crumbled and made into a stew along with pemmican and melted snow called “hoosh.”
Sledging biscuit and pemmican recipes varied as explorers experimented with what would give them the most nutrition.
Here is Roald Amundsen’s authentic recipe from his 1910-1912 Antarctic expedition for a summer’s worth of biscuits (a lot):
Amundsen’s Biscuit Recipe
Ingredients
36 kg wheat flour
33kg whole meal
33kg rolled oats, precooked
10kg icing sugar
15kg oil
2kg syrup
1.5kg salt
0.6kg sodium bicarbonate
0.6kg ammonium bicarbonate
1.5kg yeast
40 liters water
10kg powdered milk
Instructions
Mix ingredients until dough is tacky
Roll out until dough is half inch thick
Using a biscuit cutter, cut portions and lay out on a sheet tray
Bake at 350F for 15 minutes, or until the water content is 5%
This is not a useful recipe, but if you want to be really hardcore and try one, here are some recipes from the Cool Antarctica website:
Ingredients
150g plain white flour
1/2 tsp baking soda
1/2 tsp salt
30g butter
50ml cold water
Instructions
Rub the butter and flour together so that it forms a fine consistent crumb, add the baking soda and salt and mix well.
Add a little of the water and knead the mixture to a soft pliable dough, adding a little water at a time to get the right consistency, you may not need all of the water and while you can add more, you can't remove it.
Place the ball of dough on a lightly floured surface and roll it out to around 1cm or just under half an inch thick and cut into rectangles. I got 8 approx. 5cm x 7.5cm (2" x 3") biscuits from this amount.
Prick the surface of the biscuits lightly with a fork (this stops them ballooning up) and place on a baking tray, I put foil on mine first as I wasn't sure how non-stick or otherwise it would be.
Place in a pre-heated oven at 190°C. The assorted instructions I amalgamated to make these biscuits said for 15 mins and that they should be turning golden in color. After 15 mins I thought they needed a bit more cooking, so gave them another 3 mins, then I gave them another 5, at each of these three points they looked almost identical, so it seems cooking time is not critical and 15-23 mins makes little difference! Just don't let them get too dark, they should be quite pale and remember I used white flour for these if comparing them to yours.
Take them out of the oven and let them cool.
Ingredients
Lean dense meat, traditionally buffalo, reindeer (caribou) or deer. I didn't have any of these available so I used beef - min about 500g to 1kg (1.1 to 2.2 lb.)
Fat from the same kind of meat, purchased extra fat of the same kind if there is not enough on the piece you buy) - around 250g of fat for 1kg of meat, the meat will be dehydrated and much lighter when the fat is added.
The meat should ideally be very lean with a minimum of marbling (i.e. little or no fat within the meat itself). I bought a piece of top rump which was in the supermarket "Essentials" range (i.e. the cheapest) it looked to me to be exactly the same as the normal range but 60% of the price because it was a fairly small triangular shaped end piece which wouldn't have roasted evenly as it was tapered. None of this matters for pemmican as it's going to be thinly sliced and finely ground, it was ideal for my purposes as the meat only had surface fat on it, no marbling. This being England and because we like our roast beef it had a big slab of loose basting fat added by the butcher which supplied all the the fat needed to make pemmican.
My piece of meat + fat was about 1.2kg (2.6 lbs), I was limited by the amount of drying room I had in the oven and ended up using about half the meat for pemmican (the rest made some nice sandwiches when the thin strips were fried!). Cut off all the external fat you can and put to one side to be used later.
Instructions
Step One: Dehydration You could skip this step by buying ready-made jerky.
I cut the meat into strips as thin as I could comfortably manage which were about 3mm (1/8th"), a sharp knife is needed for this, I used the steel to sharpen before I started and then again about half way through.
The slices of meat were spread onto trays with no folds or overlaps.
Pemmican recipes I consulted said to dry at about 150-180 F, that is 65 to 80 C and made dire warnings about not cooking it. Above 60C it is going to cook, albeit slowly and as my ovens lowest setting was 70C I went for that. Drying times given are often 12 hrs + or maybe 24 + even. I found the meat perfectly dried out after 7 hours which may be down to the fan in the oven. The meat should snap when drying is complete, at this point you have made jerky (try not to eat it all). My wife who is a great fan of beef cooked rare looked at me with a mixture of horror and pity at this point, I tried to rise above it.
Step Two: Prepare the Fat
This takes a while, so you can get it started while you move onto step 3 coming back to check it every now and then.
I took the basting fat that was tied onto my roasting joint and all the bits of fat I had cut off the meat before I started to slice it and put them in a pan. I put this on a low to medium heat to melt the fat and left it a little while until any moisture had been removed. I have read about this taking 4 hours or more, it took me about half an hour, I put it down to drier fat and a more vigorous heating regime.
When the fat has all melted and the water been driven off take it off the heat to cool, but don't let it set, remove the solid pieces maybe in the direction of the dog or bird table. This is called tallow, but that reminds me of candles and I don't like to think I'm making food from candles, so I call it fat.
Step Three: Smash to Bits
This is the point where my modern kitchen met its limitations. You know any of those documentaries you have ever seen where the women of the village sit around chatting or singing together while they pound some kind of grain in big wooden bowls using a big wooden stick that still look more like logs than cooking equipment? Well that's exactly the kind of equipment you need here and probably exactly what the Cree used when they converted entire buffalo into pemmican to store for the winter.
Ideally the beef should be ground finely into meat powder.
I tipped the strips of dried beef into a food processor and blasted it (what a noise!), some of it turned to powder, some of it just went round and round for the ride. I took out the larger pieces and added them to a pestle and mortar (never can remember which bit is which) and ground away until my arm ached and I started to sweat. While doing this I decided I would settle for the "crunchy" version of pemmican. I prefer crunchy to smooth peanut butter, so I thought I'd probably like pemmican better that way too.
Step Four: Add Fat, Stir, and Pour Into Molds
Once the meat is ground as finely as you are happy with and your fat is melted, it's time to add the two together. You can filter the fat, though I didn't as mine was clear already, you should add it at the ratio of 60:40 ground meat to fat by weight, though as I've read that the amount can vary according to season I didn't bother weighing it.
By this point there was a fine film of meat dust on my hands, all implements, the work surface and just about everything I'd touched and I wasn't keen on spreading it further onto the scales and surrounding area. I added the melted fat to the ground dry meat until it couldn't absorb any more and poured it into a rectangular mould I made from folded aluminium foil and placed it in the fridge to solidify.
To Make Hoosh: melt snow, crumble bits of pemmican and sledging biscuit into it to make a “stew” of hoosh. Spice and flavor as desired. Enjoy!
-
If you want a sledging biscuit dupe, shortbread cookies, when cut like rectangles and poked with forks, can look just like the legendary Antarctic food. Here’s a gluten-free shortbread cookie recipe from King Arthur Flour. They go great with tea!
Gluten-Free “Sledging Biscuit” Shortbread Cookies
Ingredients
16 tablespoons (227g) salted butter, at cool room temperature*
1 cup (113g) confectioners' sugar
2 teaspoons King Arthur Pure Vanilla Extract
1/4 teaspoon almond extract, optional, or the flavor of your choice; eggnog flavor makes a delicious holiday shortbread
2 cups (240g) King Arthur Gluten-Free Measure for Measure Flour
*Since butter is such a critical element in these cookies, we recommend you use a top-quality butter. Our test-kitchen choice is Cabot.
Instructions
Preheat the oven to 300°F. Lightly grease two round 8" cake pans. If you worry about the shortbread possibly sticking in your particular pans, line them with parchment, and grease the parchment.
In a medium-sized bowl, beat together the butter, sugar, vanilla, and almond extract, then mix in the flour. The dough may seem a little dry at first; keep mixing until it comes together. If it absolutely won't come together, dribble in up to 1 tablespoon of water, until it does. This is a stiff dough.
Divide the dough in half (if you have a scale, each half will weigh about 300g), and press each half into one of the prepared pans, smoothing the surface with your fingers, or with a mini rolling pin. If you're having trouble pressing the shortbread flat in the pan because it's sticking to your fingers, cover it with a piece of plastic wrap, and push on the wrap.
Remove the wrap if you've used it, and then use a fork to prick the dough all over; this allows any steam to escape, and prevents the shortbread from bubbling as it bakes. Prick ("dock") the dough in a random pattern (though it does look nicer pricked with some kind of symmetry).
Bake the shortbread until it's a light golden brown across the top surface and a deeper golden brown around the edges, about 50 to 55 minutes.
Remove it from the oven and immediately turn each shortbread round out onto a clean work surface.
Using a pizza wheel or sharp knife, cut each round into 12 wedges. (Do this while the shortbread is still warm; if you wait until it's cool it won't cut easily.) Transfer the shortbread wedges to a rack to cool.
Serve as is, or take the cookies up a level. Drizzle them with melted caramel; or spread with melted chocolate, and sprinkle with nuts. Or try this: Set aside two shortbread wedges, and spread the remainder of the wedges with a thick layer of jam or preserves. Crumble the reserved wedges and sprinkle the crumbs lightly over the jam.
Store shortbread, well wrapped, at room temperature for several days; freeze for longer storage.
Tips
When making shortbread, we recommend using a top-quality butter; our Test Kitchen's choice is Cabot. In this recipe, we use salted butter (shortbread is traditionally made with salted butter), then add additional salt to ensure a balanced flavor. If you only have unsalted butter, increase the salt to 1/2 teaspoon.
Vary the flavor of your shortbread with the following simple additions.
For ginger shortbread: Add 1/3 cup finely diced crystallized ginger and 1 teaspoon ginger.
For chai-spiced shortbread: Add 1 teaspoon cinnamon, 1/4 teaspoon cardamom, and 1/8 teaspoon cloves.Want to make shortbread drop cookies? Drop the dough by teaspoonfuls onto a lightly greased or parchment-lined baking sheet. Flatten each ball of dough to about 3/8" thick; use the bottom of a drinking glass, the tines of a fork, a cookie stamp, or whatever implement you think will make a pretty pattern. Bake the cookies for about 25 minutes in a preheated 300°F oven, until they're set but not really beginning to brown. Remove them from the oven, and cool on the pans or on a rack. Yield: about 4 dozen small (1 3/8") cookies.
Be aware: Some of your baking ingredients can be a hidden source of gluten. Learn more at our blog post: For gluten-free baking, think beyond just flour. For additional information on King Arthur-produced products, read the complete details of our allergen program, including our contact-prevention practices.
-
Brownies kind of look a little like pemmican, but taste a whole lot better. Plus, chocolate (see my “Hot Chocolate & Champurrado” post above) is an Antarctic staple.
Here is my favorite brownie recipe, which I first encountered at Hedgebrook, a writing residency, while I was working on The Blue Hours.
This recipe comes from Sweet by Yotam Ottolenghi & Helen Goh, and it is soooo delicious!
“Pemmican” Tahini and Halva Brownies
Ingredients
1 cup plus 1 1/2 tbsp/250 g unsalted butter, cut into 3/4-inch/2-cm cubes, plus extra for greasing
9 oz/260 g dark chocolate (70% cocoa solids), broken into 1 1/2-inch/4-cm pieces
4 large eggs
1 1/3 cups/280 g granulated sugar
3/4 cup plus 3 tbsp/120 g all-purpose flour
1/3 cup/30 g Dutch-processed cocoa powder
1/2 tsp salt
7 oz/200 g halva, broken into 3/4-inch/2-cm pieces
1/3 cup/70 g tahini paste
Directions
1. Preheat the oven to 400°F/200°C. Grease your chosen pan and line with parchment paper, then set aside.
2. Place the butter and chocolate in a heatproof bowl over a pan of simmering water, making sure that the base of the bowl is not touching the water. Leave for about 2 minutes to melt, then remove the bowl from the heat. Stir until you have a thick shiny sauce and set aside to come to room temperature.
3. Place the eggs and sugar in a large bowl and whisk until pale and creamy and a trail is left behind when you move the whisk; this will take about 3 minutes with an electric mixer, longer by hand. Add the chocolate and fold through gently with a spatula—don’t overwork the mixture here.
4. Sift the flour, cocoa powder and salt into a bowl, then gently fold into the chocolate mixture. Finally, add the pieces of halva, gently fold through the mix, then pour or scrape the mixture into the lined baking pan, using a small spatula to even it out. Dollop small spoonfuls of the tahini paste into the mix in about 12 different places, then use a skewer to swirl them through to create a marbled effect, taking the marbling right to the edges of the pan.
5. Bake for about 23 minutes, until the middle has a slight wobble and it is gooey inside—they may be ready anywhere between 22 and 25 minutes. If using the 12 x 8-inch/30.5 x 20-cm pan, they will need a couple minutes less cooking time. They may seem a little undercooked at first, but they firm up once they start to cool down. If you want to serve them warmish (and gooey), set aside for just 30 minutes before cutting into 16 pieces. Otherwise, set aside for longer to cool to room temperature.
Equipment
We made these in a 9-inch/ 23-cm-square baking pan, but a 12 x 8-inch/30.5 x 20-cm pan also works well.
Storage
These will keep well for up to 5 days in an airtight container. They also freeze well, covered in plastic wrap, for up to a month. When you take them out of the freezer, they are uncommonly good eaten at the half-frozen, half-thawed stage.
-
My favorite dessert is probably the humble but classic chocolate chip cookie. I didn’t think they could be improved upon until I had them with fresh rosemary and flaky sea salt. You can add chopped fresh rosemary and sprinkle with something akin to Maldon Sea Salt Flakes to any chocolate chip cookie recipe, but I wanted to include at least one for my beloved vegans. This one is from Isa Chandra Moskowitz’s cookbook Isa Does It.
Vegan Rosemary Chocolate Chip Cookies with Sea Salt
Ingredients
1/2 cup refined coconut oil, softened
2 tablespoons lightly packed, chopped fresh rosemary
1/4 cup granulated sugar
1/3 cup light brown sugar
1/4 cup almond milk (or your favorite non-dairy milk)
1 tablespoon ground flax seeds (golden preferred)
2 teaspoons pure vanilla extract
1 1/3 cups all-purpose flour
1/2 teaspoon salt
1/2 teaspoon baking soda
1/2 cup chocolate semisweet chips
Flaky sea salt, for sprinkling
Instructions
Preheat oven to 350 F. Lightly grease baking sheet.
Use a fork to beat together the coconut oil and rosemary until smooth. Add the sugar and beat for a minute. Add the non-dairy milk and flax seeds and beat for 30 seconds. Mix in the vanilla.
Add about half the flour, as well as the salt and baking soda, and mix well. Add the remainder of the flour, along with the chocolate chips, and mix well.
Scoop about 2 tablespoons of rounded dough onto cookie sheets. Flatten gently with hands and sprinkle with flake salt, if using.
Bake for 10 to 12 minutes, until bottoms are golden brown.
Let cool on sheets for 3 minutes or so, then transfer to cooling racks.
-
The Antarctic word “freshies” is short for fresh food, i.e. fruits and vegetables, which we only receive when certain planes can come and eat for as long as we can keep them fresh. In the summer, we have a time period we call “the gap” when the ice runway is softer and can’t support wheeled aircraft from landing (so the only planes that can land do so on retractable skis). These “skiers,” as we call the LC-130s, have a limited cargo capacity, and usually freshies are at the bottom of the list, unless it’s Thanksgiving or Christmas. By my first January, I was dreaming about vegetables because I missed fresh ones (not canned or frozen). So in honor of the longsuffering Antarcticans who sometimes were so deprived they developed scurvy, consider having a spread of “freshies” (i.e. fruit bowl and vegetable tray).
-
Over seven seasons of traveling back-and-forth to Antarctica, my first and last meal in my port-of-call— Christchurch, New Zealand—became really important. I developed a ritual: go to New World grocery store, buy whatever I wanted, and feast in the Christchurch Botanical Garden. These things were just about always on my list:
Strawberries, raspberries, & tomatoes
At least two kinds of cheese, one soft (like goat cheese) and one firm
Soft bread, like a baguette and/or fancy seeded crackers
Olives
Some kind of hummus, guacamole, or other kind of spread
A fizzy fruity drink, like a cider or kombucha
Salted dark chocolate bar